Prepping for a Patch
As with all things Drupal--attention to detail is paramount. It's easy to get ahead of yourself when looking for and applying a module patch, but one of the first things you'll want to do when you find one is to ensure that the patch was built for the module version you're using. A patch is a file that applies very specific changes to an already existing file. If the existing file you have on your site (say, the info.yml file associated with a module) differs from the one the patch was created for, the patch will likely fail. You may need to update to the version listed in the issue in order to ensure the patch applies...
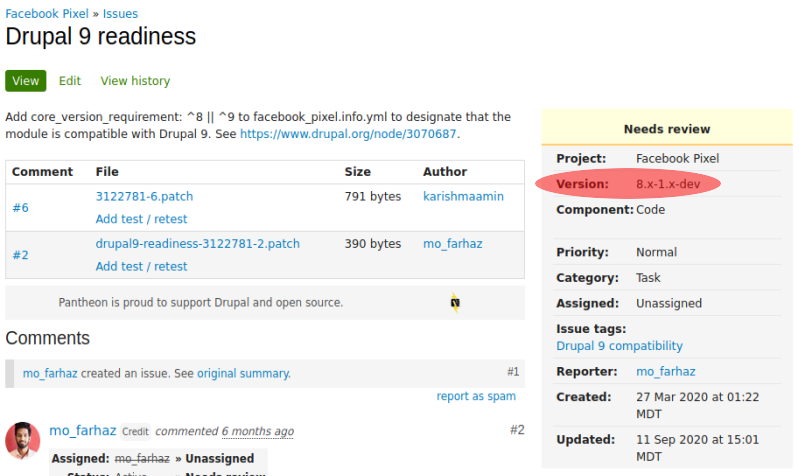
Based on that screen grab, you can probably guess I've got a solid example to run with here: I'd like to get the Facebook Pixel module into D9 compatibility, but the best the module contributors can offer is a patch (for the time being). They've built the patch for the 8.x-1.x-dev version of the module, but the version I'm running is 8.x-1.0-alpha4. Let's do a quick update with Composer:
$ composer require 'drupal/facebook_pixel:1.x-dev'
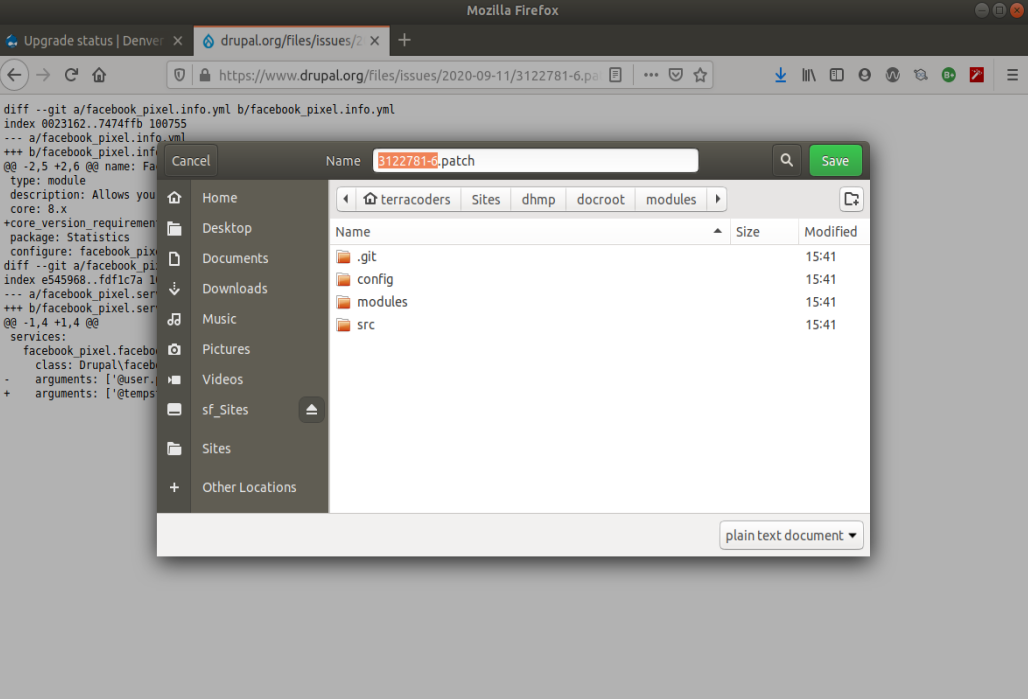
Okay, now that that's out of the way, I can go ahead and download the patch. In order to do this I usually just click the link to the patch and then right click to save it into the module directory. Like so:
Once it's saved, we'll head back to the terminal to get it applied.
Deciding how to Patch
Here's where it's easy to get turned around. There are two ways to apply a patch: with git apply, and with patch. Of the two, patch can never really go wrong. git apply, on the other hand, has more specific use cases. You can decide which to use by asking a couple of questions:
- Is your site/project as a whole managed with Git version control?
- If YES...
- Are you patching a module tied to it's own git repository (i.e., it's a -dev version)?
- If YES...
- You can use git apply or patch
- If NO...
- You'll want to use patch
- If YES...
- Are you patching a module tied to it's own git repository (i.e., it's a -dev version)?
- If NO (i.e, you don't use Git)...
- You'll want to use patch
- If YES...
Patching with git apply
Understanding git apply means understanding git--to a certain extent; most Drupal patches will be created relative to a repository root. In my case, Git already knows of one repository root: my Drupal root (i.e., docroot/). By installing the -dev version of the Facebook Pixel, I essentially initialize a second repository below my project root--that root will reside at docroot/modules/facebook_pixel. This is why things can get complicated if I don't install the version of the module the patch was built for. If, for example, I tried to apply the patch to the 1.0-alpha4 version of Facebook Pixel that I previously had on the site, git apply would try and run the patch relative to the only repository root it knows of: docroot/. It won't find the files it needs to patch there, and everything falls apart.
If you're at all unsure whether a module is set up as a repository, you should be able to run git status from it's root folder and see that your HEAD is detached at a commit outside your local branch. Running git log would also show you the commit history on the module.
Since, in my case, I've got the right module version installed, all I need to do is get the patch into the module directory and I can run git apply. I'll start by checking to make sure the directory is all in order:

Now I can run a git apply--something like this:
// the -v option tells git to run the command with verbose output
$ git apply -v 3122781-6.patch
Afterwards, of course, I'll want to cd back into my project root so I can do a git status and verify that the affected files are ready to add and commit:
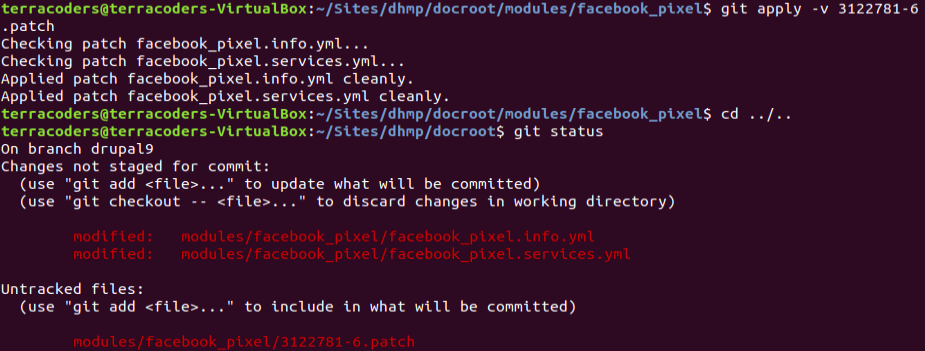
And that should be that. We've patched the module with git apply.
Patching with patch
It seems like you can't go wrong with patch, although you still want to be sure you're patching the right module version. If the module you need to patch isn't a -dev version (i.e., it was an official release that got patched after the fact, and it's not tied to a repository), you'll have to use patch so you can avoid Git looking for files in the wrong place.
So long as you're running the patch from the directory it's intended to be used in, the patch command is utterly simple:
$ patch < 3122781-6.patch
//you would also be successful with this -p otption
$ patch -p1 < 3122781-6.patch
The -p option is a way to help specify the directory level of the file you'd like to patch. Since you're running from the root of the project, and the patch was built to run from that root, though, it's not much of a concern.
To Recap
Make sure you're running the module version the patch was intended for; patch will always get the job done. If you're module is tied to a repository, you can use git apply.