Background: Pi 4 Applications
I've previously written a few articles on the Raspberry Pi 4 as desktop replacement; the gist of my review was basically, "... yes, you can--but, would you really want to?" Don't get me wrong. It's exciting, perhaps even inspiring, to see where Pi hardware is headed. The Pi 4 as a daily driver, however, will likely leave you questioning whether there aren't better ways to apply this little SBC. There definitely are.
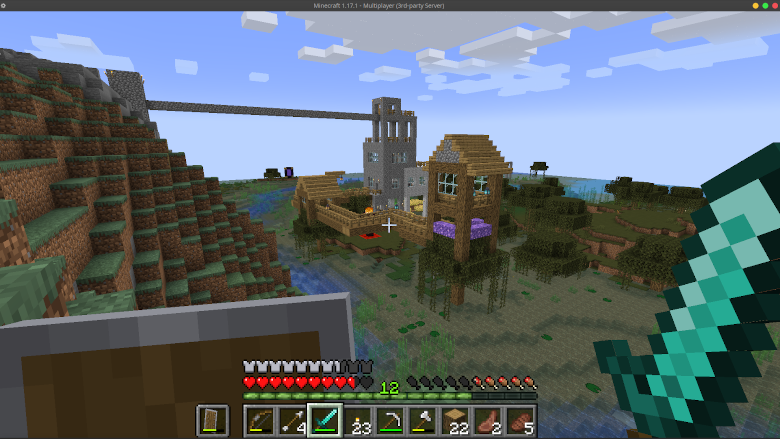
My boys are avid 'Minecrafters'. So, with my little Pi 4 collecting dust, I thought to myself: "what better way to win points with the kids than by repurposing the Pi as a Minecraft server?" Installation and setup is relatively easy--even for people having no real experience with server technology. And, I'll commit to saying: I think the Pi 4 handles running a Minecraft server better than it does Raspberry Pi OS. Will it ever function at the level of Hypixel?--Absolutely not. But, it can certainly handle a household of crafters, and might just elevate your technological prowess to the level of 'GOD' (in the eyes of children--at least)!
Balena Minecraft Server
Depending on hardware profile, there's certainly more than one way to get a Minecraft server up and running. If you're on a Raspberry Pi 4, though, you'll almost definitely want to go with the Balena Minecraft Server. You can find thorough documentation for how to get the Balena Minecraft Server up and running at Balena's blog; you'll also find good documentation at AlexProgrammerDE's GitHub page (Alex looks to be the sole maintainer of the code).
To get the server up and running, you'll need to register a free account with Balena. Once logged into Balena's dashboard, you can build an 'image' of the server--this includes your Wi-Fi/network setup so that the server automatically connects without manual setup. From there, you download the image and flash it to your Pi 4's microSD card (Balena has a proprietary application, the Balena Etcher, which can flash the card for you). Insert the microSD card into your Pi 4, boot it up, and you're more or less good to go. Again, for a full walk through, reference the How-To's above.

It Can't Actually Be That Easy!
If you're thinking, "this all sounds a little too good to be true," you're probably right. You may have a few hiccups along the way. Let's touch on two of the notable challenges you may encounter:
- You'll definitely need to familiarize yourself with the Balena Dashboard--the platform used for managing the server. Expect a slight learning curve. All things considered, though, the Balena platform is powerful, robust, and extremely well designed. I do business on Acquia Cloud; Balena gives Acquia a serious run for their money--and they do it at the free tier!
- Your server might not run without reinstalling the paper.jar file. This is a particularly frustrating issue, since a simple web search doesn't immediately turn up the *right* solution. More on this below...
[mc-server] Error: Invalid or corrupt jarfile paper.jar
If when you first boot your server you get this error, my recommendation is that you reinstall the paper.jar file. The maintainer, AlexProgrammerDE, has suggested in various support forums that the solution to this error is to add an environmental variable (ENABLE_UPDATE) with a value of true to your device. This is done via the Balena dashboard:
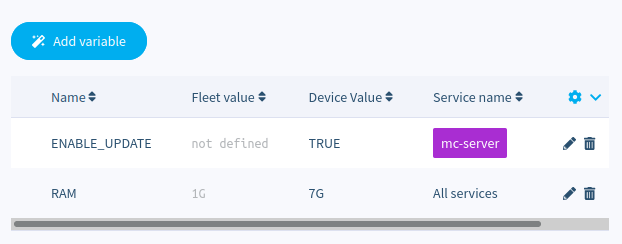
This variable toggles automatic updates for the paper.jar file--presumably, this would make the Pi download an updated paper.jar file at boot. Unfortunately, this did not resolve the issue in my case. If you read through the support tickets very carefully, though, you'll notice that AlexProgrammerDE has also occasionally suggested reinstalling the paper.jar file. You can download the paper.jar file at PaperMC.
At the moment, I would recommend downloading the 1.17 version since the 1.18 doesn't yet have a stable release (more on the 1.18 update below). Once you download the file from PaperMC, delete the existing paper.jar file on you sever and replace it (i.e., using SCP) with the downloaded file. Reboot, and hopefully your error disappears (it worked for me)!
Review: How Does the Pi 4 Minecraft Server Run?
It runs surprisingly well! But let's talk requirements. Balena's documentation recommends the 4GB RAM Pi 4; I'd recommend the 8GB version; this is what I run, and it's pretty obvious the server is happier with more than 4GB RAM:
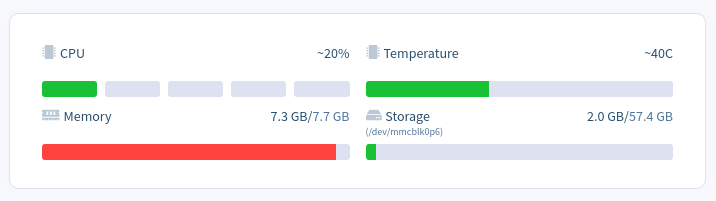
Balena also recommends a 16GB microSD card. As you can see above, I've got a 64GB card on my Pi with disk usage that's no where near the 16GB Balena recommends. Still, cards are cheap these days and I'd definitely opt for scalability. When you create a new world on your Minecraft server, old worlds don't get purged. I can see the storage disappearing if you're constantly creating new worlds and you're not on top of managing unused resources. World file seem to take up a decent amount of space--as I recently discovered while making backups.
In the screen shot above, the server is essentially sitting idle; during game-play, it's not uncommon to see the CPU usage hit 70%+. In fact, when booting, I often see an error on Balena's dashboard that the server can't 'keep up'. Once the server is up and running, and once users (3 at most, in our household) are connected I rarely experience lag on the server.
In regards to lag, here are a few things you'll want to be careful of:
- The Pi 4 is never going to be able to handle large numbers of users. I've seen it suggested that it really can't handle more than 10 users--I believe you can set a cap on users in the /serverfiles/server.properties file. With only 3 crafters in our house, I can't really test the limits here. My kids are gung-ho to open our Pi to external access so their friends can play with them, though. I may need to post an update.
- I'd be careful with plugins. My kids are all about the plugins (DeadChest, Shopkeepers, etc.). Some of these plugins are relatively small; others look to be much more resource demanding. My recommendation would be to keep your Minecraft server as 'vanilla' as possible.
- You'll want to have a good fan for your Pi 4--to keep it cool when the CPU starts throttling.
Lastly, you may also want to be careful of which paper.jar version you use... more on that below.
1.18: Caves and Cliffs
The client version of Minecraft was just recently updated to 1.18 (Caves and Cliffs); this was a pretty big deal within the Minecraft community (my kids have been on about it for months, now). With the client update, a stable update to paper servers is also in the works. You can download a 1.18 paper.jar file already, but I'm hesitant to do it not just because the release isn't yet stable. As I understand it, the Caves & Cliffs update increases the overall world depth in order to accommodate new cave and cliff biomes. This means that your server will need to render 50% more blocks than normal at initial world build. I've heard that this can effectively slow the server down by 50% (causing avatars to free fall while the server finishes building the world). Suffice it to say, I imagine the 1.18 Caves and Cliffs update will push the Raspberry Pi 4 to the max (even at 8GM RAM).
There's no reason you have to update to 1.18. You can run the 1.17.x paper.jar version on your server for the foreseeable future; your users will just have to connect to it with a 1.17 client. Since the client is likely configured to auto-update (Microsoft recently purchased Mojang, right?--you know they love themselves an 'auto-update' feautre!), you'll need to manage the client appropriately; You can add a 1.17 installation via the 'Installations' tab in your Minecraft launcher if your client has already auto-updated to 1.18.
Final Thoughts
The Pi 4 isn't without it's limits as a Minecraft server. It's quite capable of providing you and your family with a whole lot of fun, though. If you're looking for educational application of the Pi 4 that can provide your kids (and maybe yourself) with entertainment while learning about server technology, there probably isn't anything better!
Lastly, I'll be putting together a few Bash scripts for helping to manage the server; be on the lookout for those. Also be on the lookout for a post on how you can use balenaCloud to setup a Pi-Hole network-wide ad blocker!