I run Xubuntu on my work computer; I'd run straight-up-Ubuntu, but it's just too late--too much of a pain to migrate at this point. For my foray into Linux distros, I wanted a light build and Xubuntu was my weapon of choice. For the most part, Xubuntu and Ubuntu are sibling OS'es, though. And, this means that if I ever need to figure out how to fiddle around with Xubuntu, the Ubuntu forums are generally the best place to start.
So that's where I found myself when I recently decided to finally get Japanese up and running on my computer. It doesn't happen all that often, but this time around I had a hard time finding an answer. So, for anyone struggling with language support and Xubuntu, here's how I managed to get Japanese setup.
Step 1: make sure the language is installed.
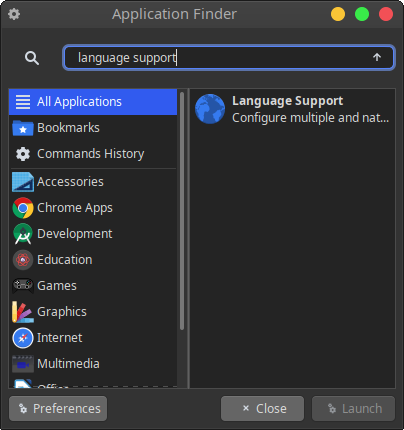
The first thing you'll want to do is make sure that your target language is actually installed. If it's not, it should be quick and easy to do. In the Application Finder, look for "language support" and open it.
Once you're in, scan past the languages for menus and windows (likely defaulting to whatever you specified at install--leave that alone for now) and you'll find a button allowing you to install or remove languages. Click!
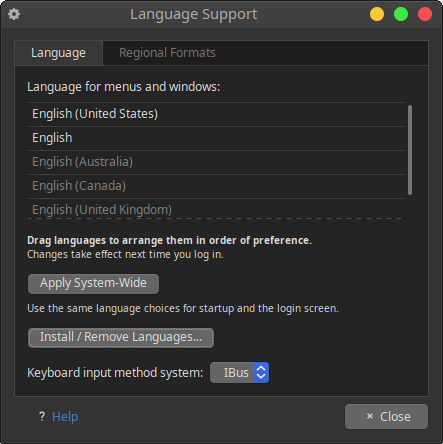
If your target language isn't already installed, go ahead and select it for install. Hit apply, and sit tight while fonts are downloaded.

Don't leave the Language Support menu quite yet. Once you've installed the language, there's one more thing we'll want to do so we can enable our language as an input. Underneath the "Install/Remove Languages" button, you'll find a drop down allowing you to select a keyboard input method system. On my computer, this was defaulting to fcitx. There is an fcitx configuration panel under your system settings which, in theory, should allow you to toggle between keyboard layouts. Save yourself a headache, and go with IBus (Intelligent Input BUS).
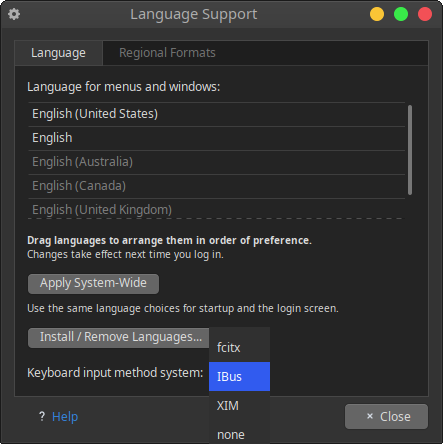
NOTE: if, for some reason, you don't see IBus in the dropdown, it shouldn't be too tricky to install. You can either do a sudo apt-get install ibus from the command-line or, if the terminal isn't your thing, find it on synaptic package manager (errr... sudo apt-get install synaptic if you don't have it).
Okay... now, that we've selected IBus for our keyboard input method, let's move to the next step...
Step 2: set your language up as an input.
This step is pretty straight forward as well. Go back to the Application Finder and open your IBus preferences; navigate to the input method tab and click on Add:
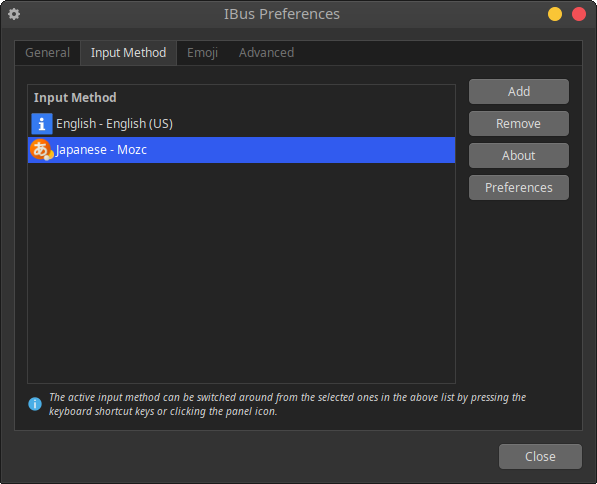
You'll be prompted to select a new input method; in my case, I'm selecting Japanese. There are a couple different input methods for Japanese. When I have time, I might play with the different ones here, but I've seen Mozc used in reference to Japanese setup on non-Xubuntu distros so that's what we'll go with. Add!
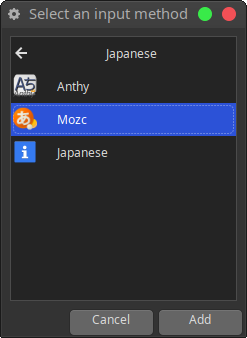
Cool! With that, we should now be able to use Japanese as a language input. Just one last thing, though: navigate to the General tab in IBus preferences and let's tick the checkbox next to "Show icon on system tray"; this will give you a visual reference within your panel (provided the system tray is set to show there) for which language you're using.
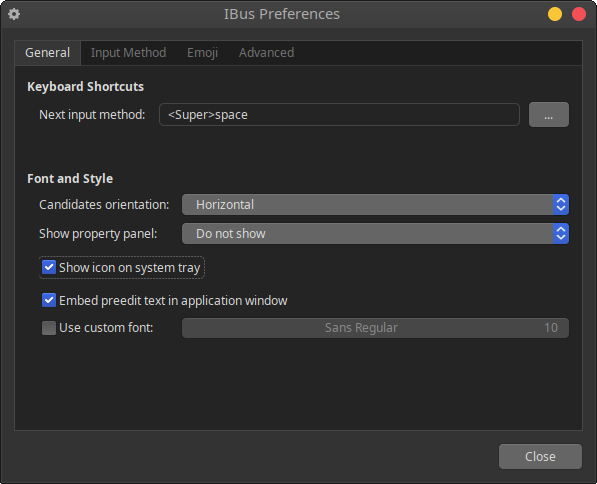
How do we toggle languages?--you might ask... Note: in the General tab, IBus defaults to to a combination of <super> + space. The <super> key is the "Start" or "Windows" button on my PC keyboards; I believe it's the "option" key on Mac keyboards. You should be able to change this if you want, but since it more or less parallels the toggle I used to use on my Mac, I'm down with it.